LILYGO T-Deck Plus 868MHz Meshcore Firmware TTGO Development
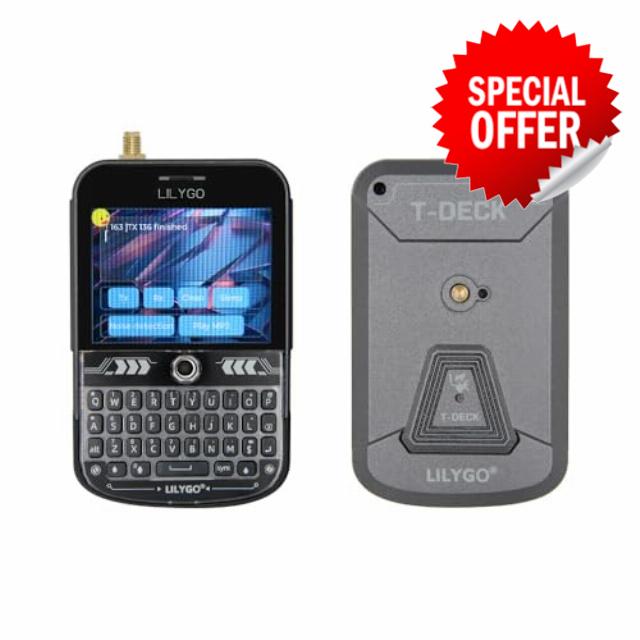
LILYGO T-Deck Plus 868MHz Meshcore Firmware TTGO Development Board 2.8 inch display
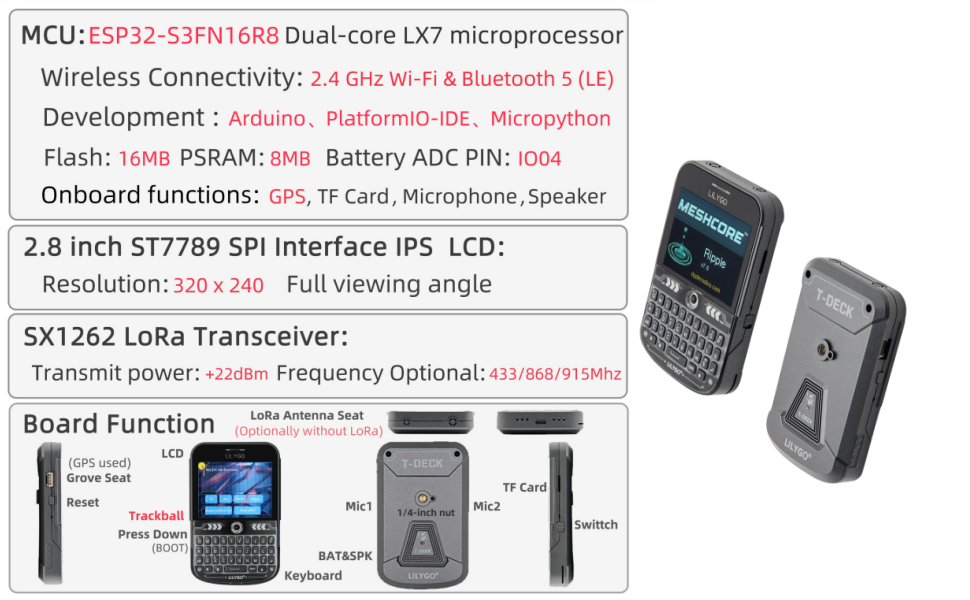
Product parameters:
T-Deck-Plus has assigned the pins of the Grove interface to the GPS module, so the Grove interface of T-Deck Plus cannot be used. This version uses a new keyboard.Github: github.com/Xinyuan-LilyGO/T-DeckWIKI: wiki.lilygo.cc/NOTE: The device does not have a built-in battery indicator, so the display of the battery level is not accurate. This is not a product defect. The firmware version will optimise the program settings for the battery percentage display. Note on the manual: Our product is currently classified as open source hardware. Multiple community firmware customizations are available, with different firmware versions continuously updated. Conventional paper manuals are often outdated and can lead to misinformation. Therefore, we have standardized our documentation via GitHub, Wiki versions, YouTube, online manuals and video tutorials.
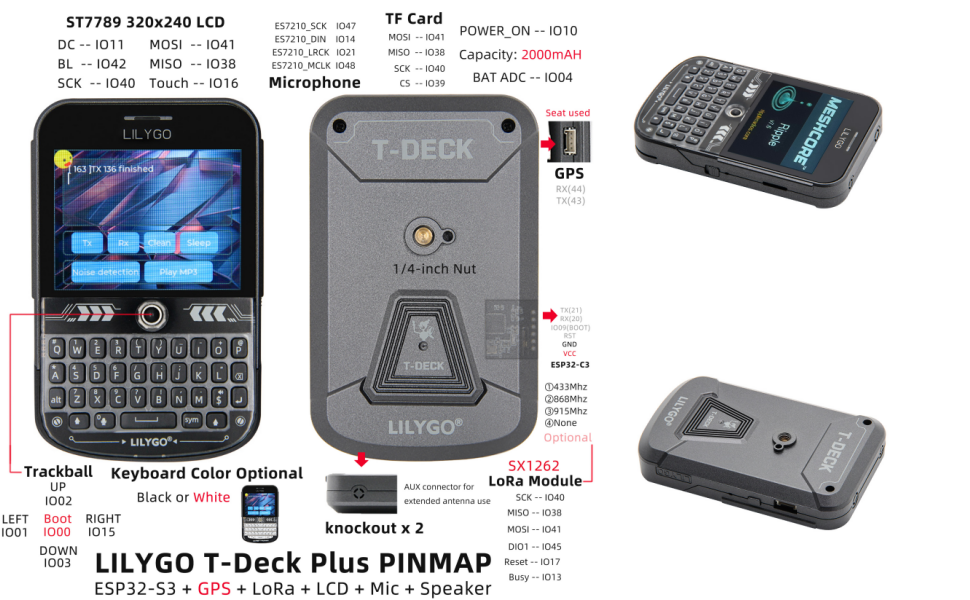
PIN MAP
When a microphone is used, the GPIOO button cannot be used. If the sketch cannot be uploaded, you need to press the middle of the trackball and then plug in the USB plug. This puts the chip into download mode, and you can then click "Upload" to upload the sketch. T-keyboard: The programming and burning interface of the ESP32C3 is located on the 6-pin connector next to the RST button. The order starts at the top of the RST button with 3V3, GND, RST, BOOT, RX, TX. You need to connect USB TO TTL externally to burn the keyboard firmware. With TTL without automatic download circuit, you need to short circuit the BOOT pin and GND before switching on, and then turn on. At this time, T-keyboard switches to download mode. After completing the burning, you need to disconnect GND and BOOT before running the program. T-Deck cannot upload sketches. Please enter upload mode manually.
Connect the board via the USB cable. Hold down the BOOT button while holding down the BOOT button (on the trackball above the keyboard, press down). Press the RST button. Release the RST button. Release the boot button. Release the boot button. Upload the sketch.
- Firmware: Meshcore firmware
- [GPS] This product can choose between Ublox or L76K GPS modules.
- WIKI: wiki.lilygo.cc/get_started/en/wearable/T-deck-plus/T-deck-plus.html
- 【Github】github.com/Xinyuan-LilyGO/T-Deck
- Product service: If you have any questions or suggestions about the product, please feel free to contact us. We will answer your question as soon as possible
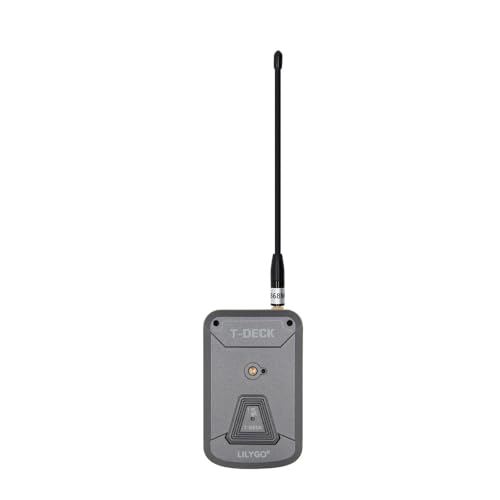
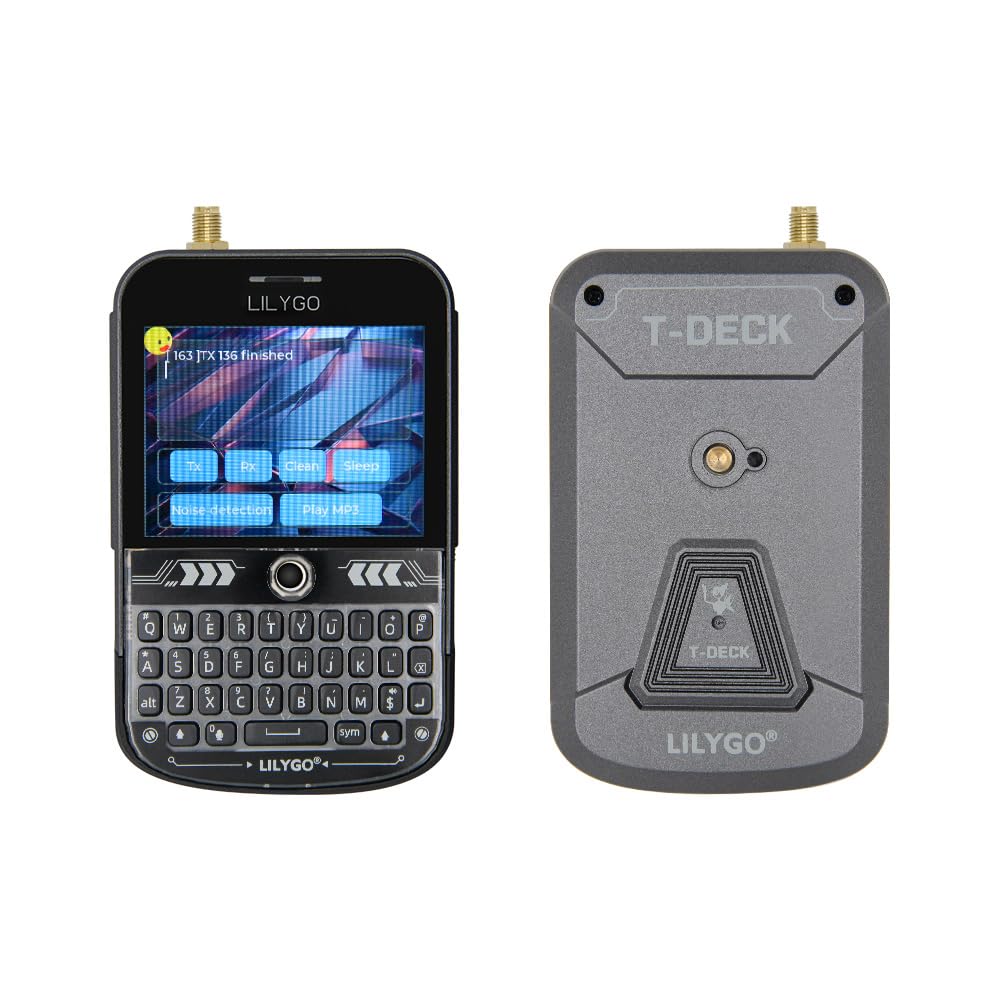
| SKU: | B0GZP5NTJL |
| Size: | 2.8 Inches |
| Brand: | LILYGO |
| Model: | L76K Externe Antenne |
| Manufacture: | LILYGO |
| Size: | 2.8 Inches |
Product Description

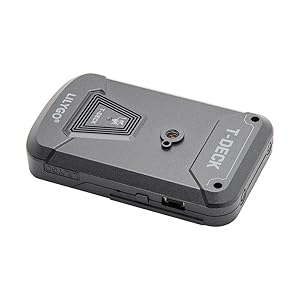
When a microphone is used, the GPIOO button cannot be used. If the sketch cannot be uploaded, you need to press the middle of the trackball and then plug in the USB plug. This puts the chip into download mode, and you can then click “Upload” to upload the sketch. T-keyboard: The programming and burning interface of the ESP32C3 is located on the 6-pin connector next to the RST button. The order starts at the top of the RST button with 3V3, GND, RST, BOOT, RX, TX. You need to connect USB TO TTL externally to burn the keyboard firmware. With TTL without automatic download circuit, you need to short circuit the BOOT pin and GND before switching on, and then turn on. At this time, T-keyboard switches to download mode. After completing the burning, you need to disconnect GND and BOOT before running the program. T-Deck cannot upload sketches. Please enter upload mode manually.
Connect the board via the USB cable. Hold down the BOOT button while holding down the BOOT button (on the trackball above the keyboard, press down). Press the RST button. Release the RST button. Release the boot button. Release the boot button. Upload the sketch.